
1. Introdution
SIMITAR stands for SIMITAR: SnIffing, ModellIng and TrAffic geneRation. SIMITAR is a tool for creating synthetic and realist network traffic. It uses actual netowork traffic (live captures or pcap files) for creating a flow-oriented traffic model. This model is used for creating network traffic, and is provided as parameter for the traffic generator. It is self-configurated because you dont have to care about adjusting stochastic parameters such as exponenetial rates, protocol, ports, or traffic rates as input parameters. It is all contained inside te traffic model created.
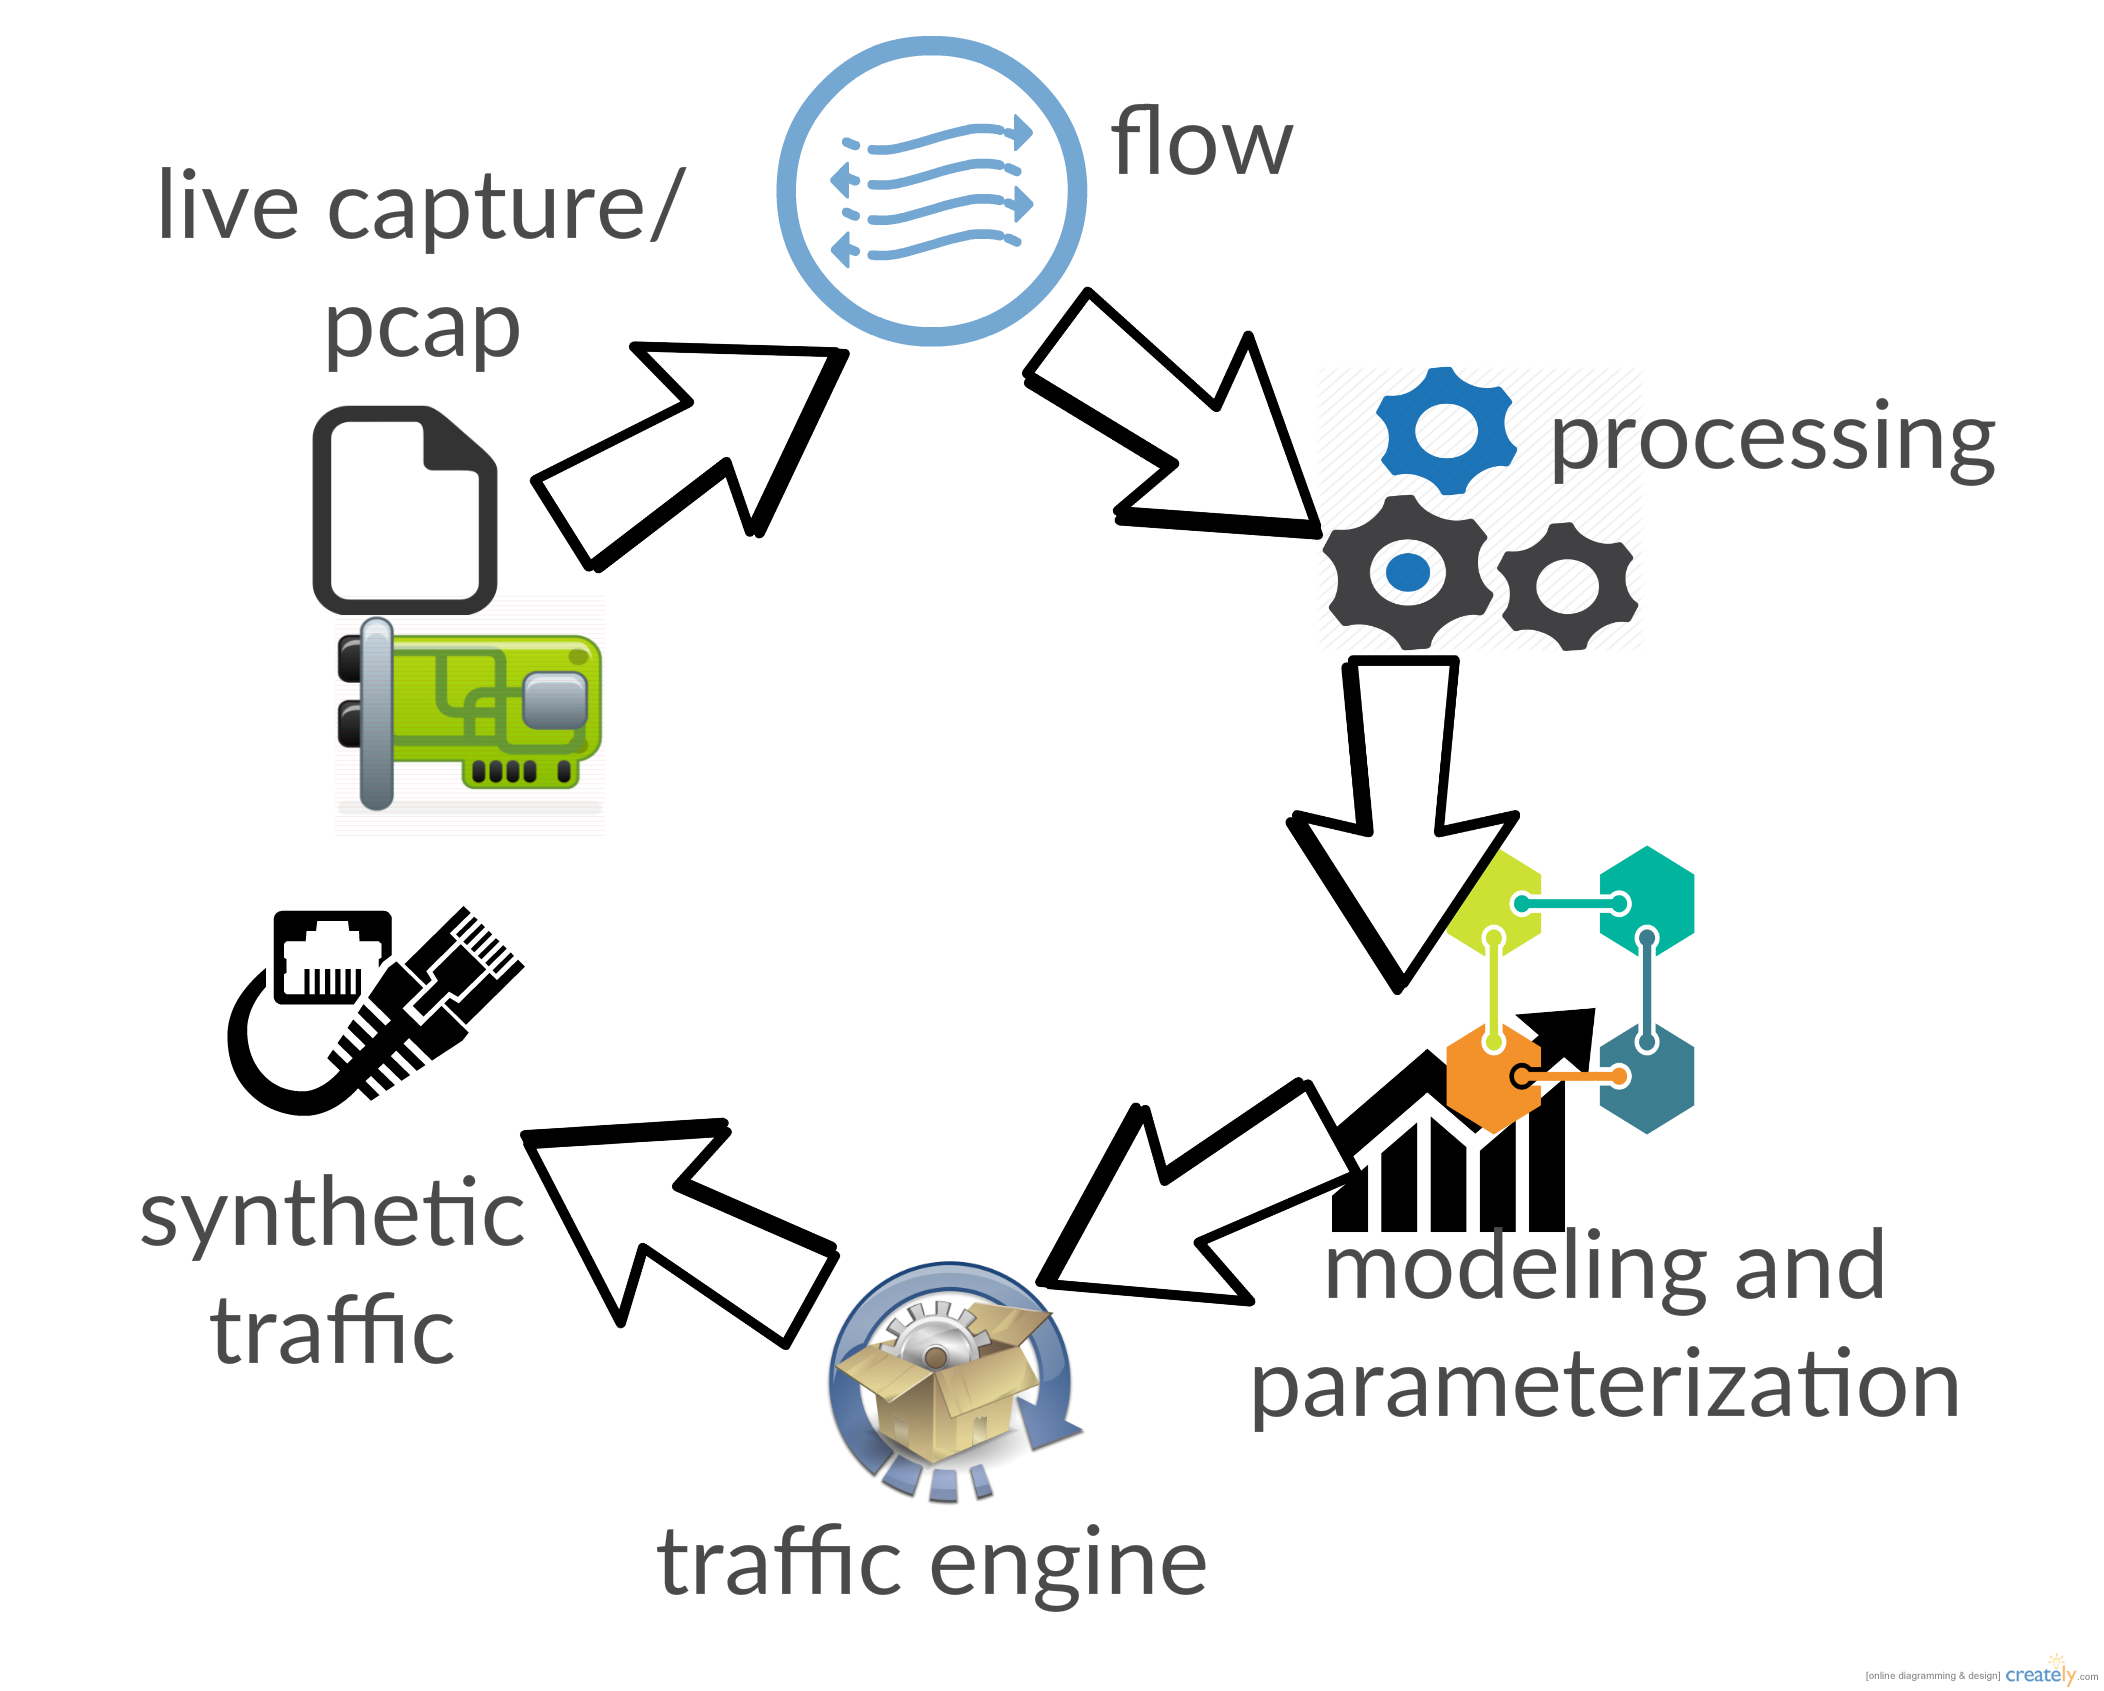
The traffic generator is not attached to a especific technology. It has a flow scheduler, which creates a thread for each flow. As traffic generator engine we can use from applications to low-level C/C++ lybraries. Currently we have extended it to Libtins(C++ packet frafter library) and Iperf.

2. Quick installation Guide
Clone this project directory:
git clone https://github.com/AndersonPaschoalon/ProjetoMestrado
Go to SIMITAR root directory:
cd Projeto/Mestrado/SIMITAR/
Run the build.py script. This is a script used to simplify the installarion of dependencies and build process. Type:
Types y/Yes for any request of confimation. To build type:
./build.py --clean
./build.py --build
These commands will ensure all required directories are created, and run make clean and make for each component in the right order. Link for all the binaries will be placed at bin/. This application use absoluthe paths for the files, so you may execute any executable from any place. These links and executables are equivalent:
| executable |
link |
| sniffer/sniffer-cli.py |
bin/simitar-sniffer |
| trace-analyzer/trace-analyzer |
bin/simitar-trace-analyzer |
| simitar-gen/simitar-gen |
bin/simitar-gen |
3. Components and apps
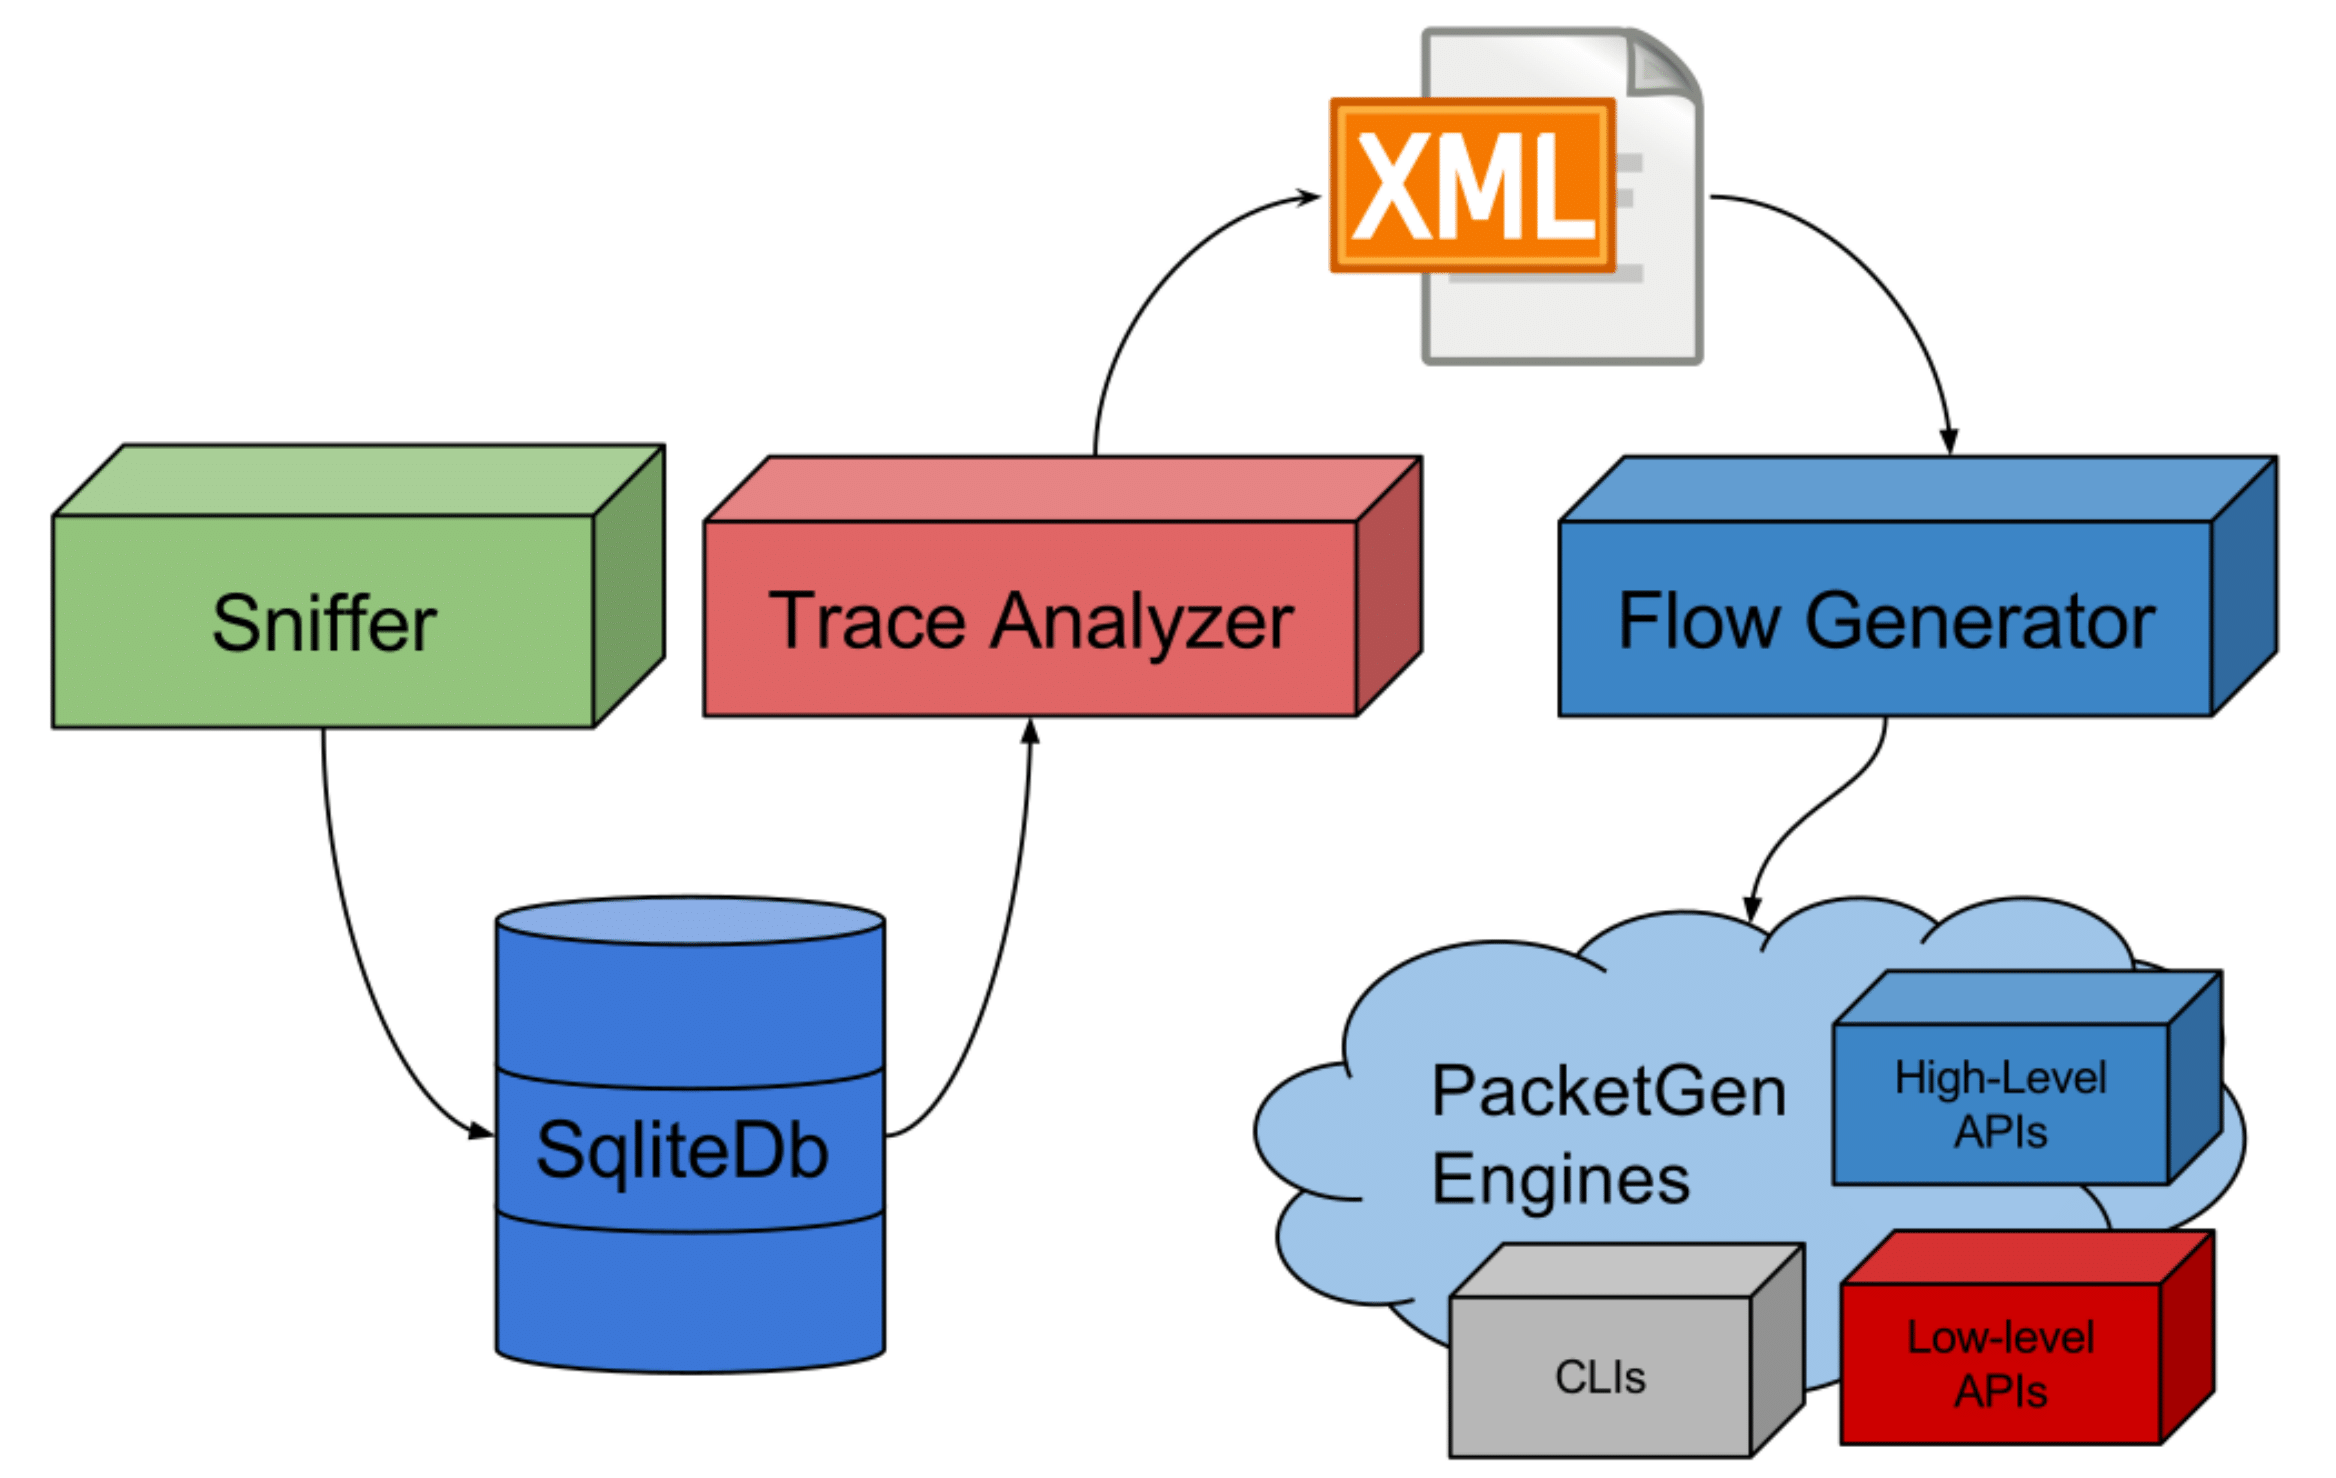
SIMITAR is composed of 4 components:
- Sniffer (
sniffer/sniffer-cli.py or bin/simitar-sniffer) : Capture data from the pcap files or live captures.
- Database (
data/db/Trace.db): local database for the capture traces.
- Trace Analyzer (
trace-analyzer/trace-analyzer or bin/trace-analyzer): creates the XML file (Compact Trace Descriptor) used by simitar-gen to create a synthetic traffic. The files are placed at the directory /data/xml/. Some pre-generated Compact Trace Descriptor files are already placed there.
- Traffic Generator (
simitar-gen/simitar-gen or bin/simitar-gen): creates the sysnthetic traffic. A component diagram of the wole project is placed in the image below.
4. Basic Execution
Before executing any command, you must load the enviroment variables:
source data/config/simitar-workspace-config.sh
Sniffer works collecting information about an input traffic such as a pcap file
or a live traffic, and stores it in a sqlite3 database. It can be executed on
the directory sniffer/. Eg.:
./sniffer-cli.py new "intrig-traffic" live eth0 --timeout 15
This command will start and store a new capture trace on the local database. This capture will least for 15 seconds. Ather this execution, use this command to show the capture information on the database:
Trace Analyzer creates a compact trace descriptor in XML file using a saved
in the database. It salves the xml on the directory data/xml/. It can be
executed on the directory trace-analyzer/. Eg.:
./trace-analyzer --trace "intrig-traffic"
The name passed in the --trace option must be the same as the one stored in the local database. Many others options are available(you may check tem typing --help) but none is mandatory. They may be used to control the parameters on the modelling process. After the execution, you may type on the root directory this command do check if the compact traffic trace was created:
ls data/xml/* |grep "intrig-traffic"
It must show two files: intrig-traffic.sec.xml and intrig-traffic.ms.xml. The first was parameterized using a time-scale of seconds, and the second of milliseconds. Some tools, like D-ITG use milliseconds as parameter input for its stochastic models.
The traffic generator simitar-gen is able to create traffic based on the model
created by the traffic generator. It can be executed on the directory
simitar-gen/. To generate and receive the traffic, execute:
sudo -E ./simitar-gen --tool iperf --mode client --ether eth0 --xml ../data/xml/intrig-traffic.sec.xml --dst-ip 10.0.0.2
sudo -E ./simitar-gen --tool tins --mode client --ether eth0 --xml ../data/xml/intrig-traffic.sec.xml
sudo -E ./simitar-gen --tool iperf --mode server --ether eth0 --xml ../data/xml/intrig-traffic.sec.xml
Iperf and D-ITG require the use of a client and a server, since it creates a
connection before sending any packets. Others tools like tins, require
just the operation as a client, since since it crafts packets “on the wire”. It is important the use of the -E option on sudo to export the enviroment variables.
5. Demos
5.1. 5 minutes (or less) demo (if you already have everything installed)
Open two terminals (we recomend terminator). First, lets try iperf as packet generator engine. At SIMITAR root directory:
source data/config/simitar-workspace-config.sh
sudo -E ./bin/simitar-gen --tool iperf --mode server --ether lo  --xml data/xml/skype.sec.xml
Than, on another terminal, execute:
source data/config/simitar-workspace-config.sh
sudo -E ./bin/simitar-gen --tool iperf --mode client --ether lo  --xml data/xml/skype.sec.xml --dst-ip 127.0.0.1
To test Libtins as packet generator engine, just execute:
source data/config/simitar-workspace-config.sh
sudo -E ./bin/simitar-gen --tool tins --mode client --ether lo  --xml data/xml/skype.sec.xml --dst-ip 127.0.0.1
5.2. OpenDayLight Topology Demo
For running this demo, you must have installed the following tools installed:
- Wireshark
- Mininet
- OpenDayLight (distribution-karaf-0.4.0-Beryllium)
- SIMITAR
We also recoment a XML visualizer, such as XML Tree Editor.
5.2.1. Installing and running OpenDayLight (Beryllium)
First, we procedute with the follow commans on the terminal
apt-get update
apt-get install maven git unzip
Than, you cd to the directory you want to install OpenDayLight, and execute:
wget https://nexus.opendaylight.org/content/groups/public/org/opendaylight/integration/distribution-karaf/0.4.0-Beryllium/distribution-karaf-0.4.0-Beryllium.zip
unzip distribution-karaf-0.4.0-Beryllium.zip
export JAVA_HOME=/usr/lib/jvm/java-1.8.0-openjdk-amd64
To run OpenDaylight, execute:
cd distribution-karaf-0.4.0-Beryllium.zip
./bin/karaf
On the OpenDayLight terminal, execute
opendaylight-user@root> feature:install odl-restconf odl-l2switch-switch odl-mdsal-apidocs odl-dlux-core
opendaylight-user@root> feature:install odl-dlux-all odl-openflowplugin-flow-services-ui
opendaylight-user@root> feature:install  odl-dlux-core odl-dlux-node odl-dlux-yangui odl-dlux-yangvisualizer
You may access the web interface of OpenDayLight using this link and login/passorwds on your browser:
http://localhost:8181/index.html
login: admin
password: admin
5.2.2 Running and visualizing our Mininet topology:
From SIMITAR root directory, run:
cd Tests/SimulationMininet/
First of all, clean up mininet:
We first will build the simpler topology:
sudo ./simple-topo-test.py
From Mininet terminal, you have to tell OpenDayLight where are all switches:
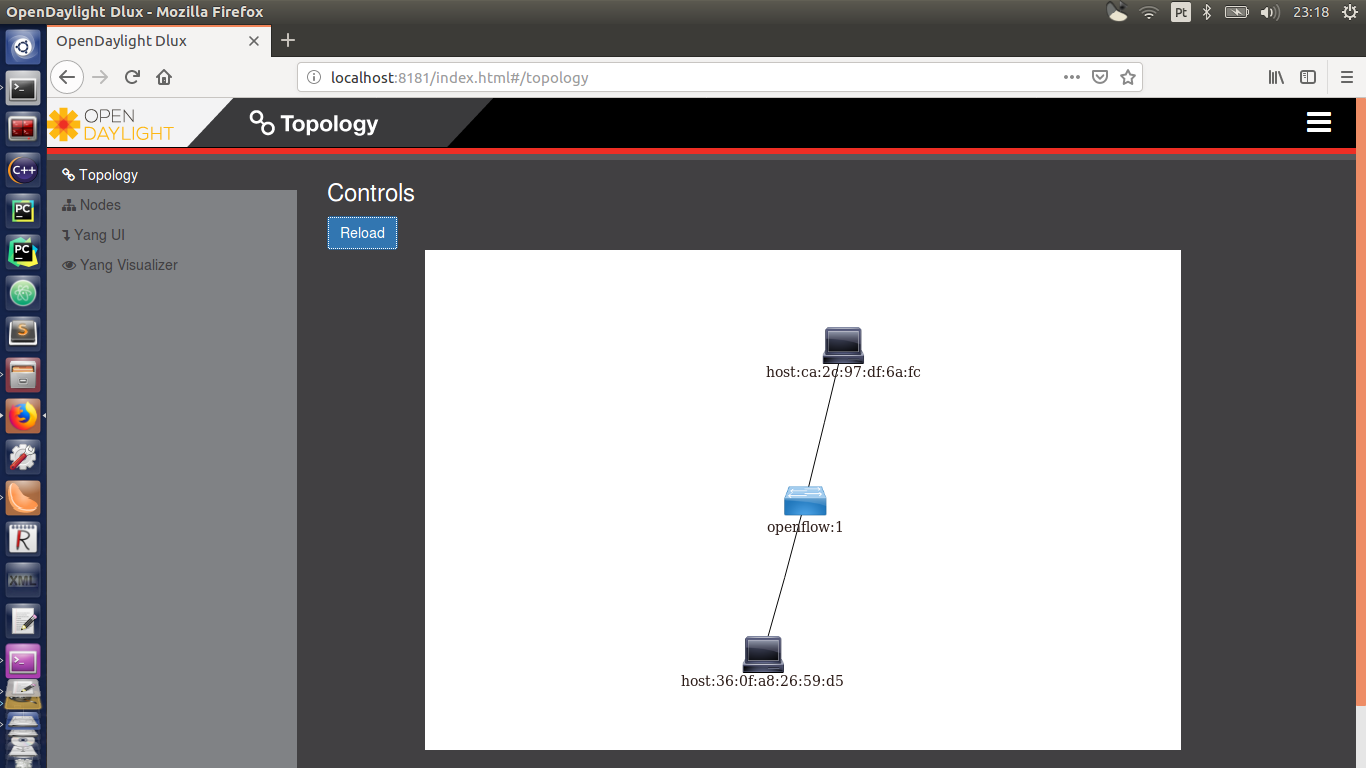
5.2.3 Finally, SIMITAR
In the screenshot below you will see the topology we just build. To open a terminal for the host h1, type on mininet console:
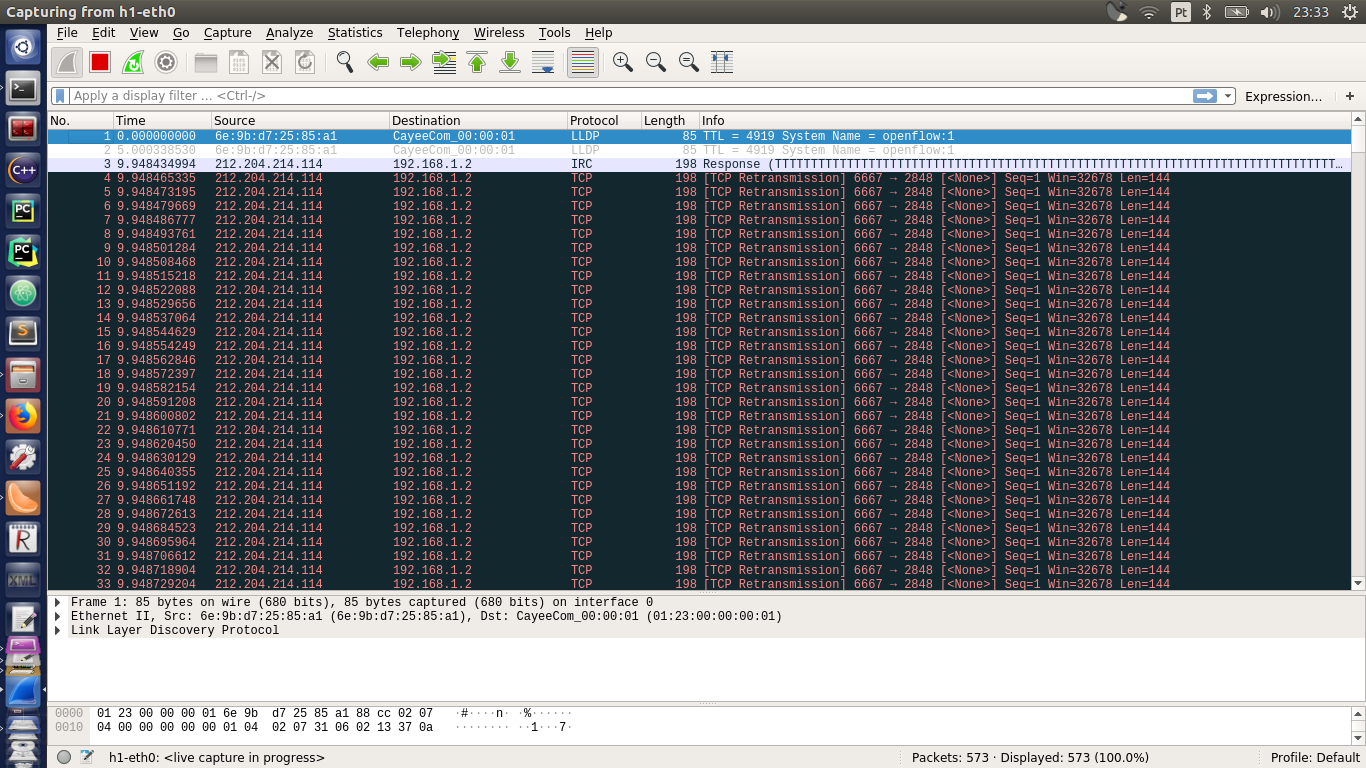
On the h1 terminal, open Wireshark:
and start scanning the interface h1-eth0. To run SIMITAR, execute:
source data/config/simitar-workspace-config.sh
 ./bin/simitar-gen --tool tins --mode client --ether h1-eth0 --xml ./data/xml/skype.sec.xml
If you go to the Wireshark window you just oppened, you will the the packets being generated, and how the bandwidth looks like over the time. Simitar will stop its execution once the whole traffic descripted by skype.sec.xml is executed.
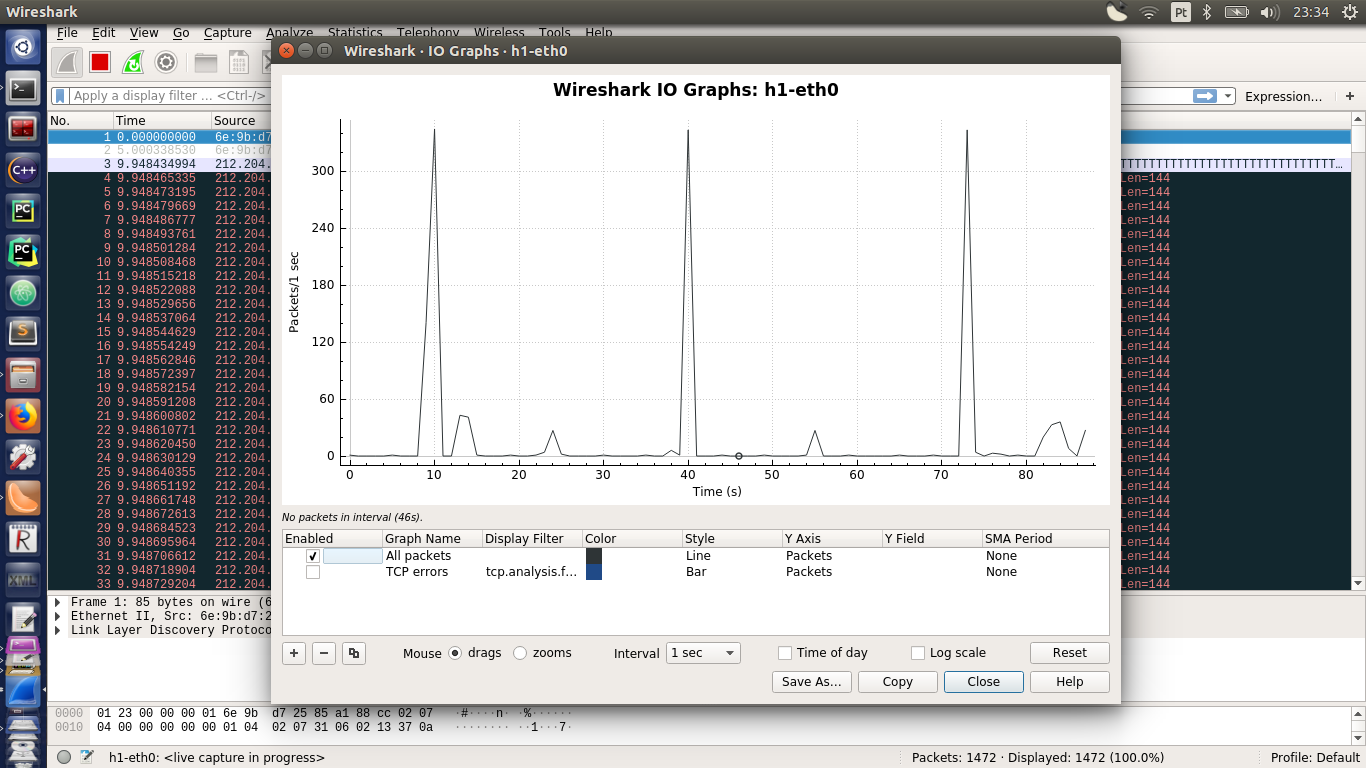
Since the implementation of Libtins, specified by the option --tool tins works as a packet injector, there is no need for the use of a server-size instantiation of SIMITAR. But if you choose iperf as traffic generator tool, you will need it. This time we will build a funnier topology:
# @ Tests/SimulationMininet/
$ sudo mn -c
$ sudo ./simple-topo-test.py
# @ mininet terminal. IF it fails the first time, just try again
mininet> pingall
On the OpenDayLight session you oppened on your favourite bronwnser, reload the page. You will find something like this:
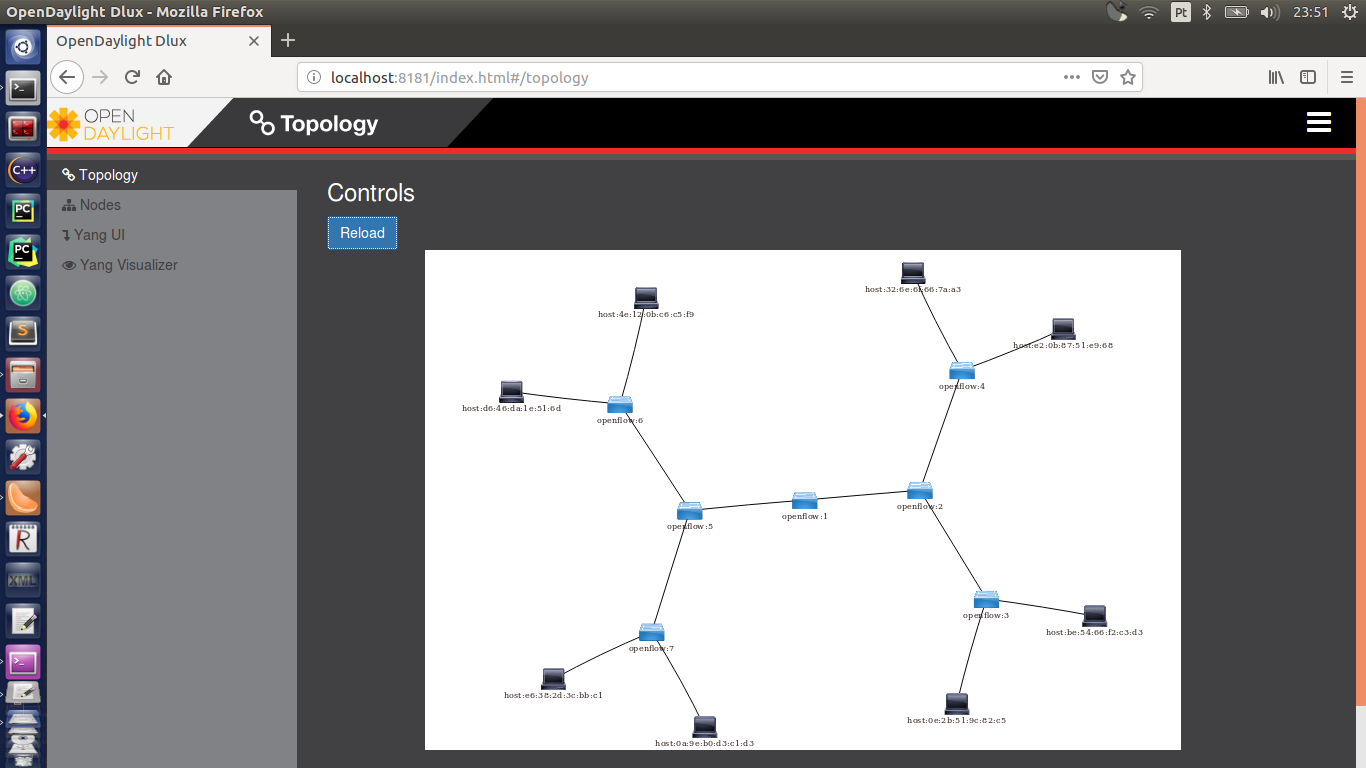
Much cooler.
Now, on the mininet terminal, execute:
mininet> xterm h1
mininet> xterm h8
Run wireshark on both, and go to SIMITAR directory on both was well. On the h8 terminal, run the server first:
# xterm h8
source data/config/simitar-workspace-config.sh
 ./bin/simitar-gen --tool tins --mode server --ether h1-eth0 --xml ./data/xml/skype.sec.xml
Iperf need to know the IP addr of the destination, to stablishes contact. Try both commans below (in two different runs). In the first, you will just pass a single Ip address of destinations. For the second, to run properly, you will need to execute the server-side command of simitar on all hosts, from 2 to 8. The argument is a CSV file, in the format ,MACAddr. For iperf, there is no need for the MAC address. The MACs on the file `data/csv/ip-addrs-list1.csv` are not actually used.
# xterm h1
source data/config/simitar-workspace-config.sh
 ./bin/simitar-gen --tool iperf --mode client --ether h1-eth0 --xml ./data/xml/skype.sec.xml  --dst-ip 10.0.08
# xterm h1
source data/config/simitar-workspace-config.sh
 ./bin/simitar-gen --tool iperf --mode client --ether h1-eth0 --xml ./data/xml/skype.sec.xml  --dst-list-ip ./data/csv/ip-addrs-list1.csv


